Friday, March 14, 2014

Ready for Paint

It has been quite a while since the last update and a lot has happened since (including living in London for 2 years which really slowed down progress). We are just finishing off a few more jobs and we will be ready to relaunch.

I'll try to run through a few of the things that have happened in the mean time. 

The photo below shows the boat ready for paint. After the soda blasting we filled, sanded and faired the entire boat back to a smooth finish. The blasting left the hull with a really good surface that was easily hand sanded and didn't cause any big low spots which can occur when machine sanding. 

The next big challenge was to get the boat off the trailer so that the boat could be painted and repairs could be made to the trailer. We constructed two big wooden trestles which were just taller than the height of the keel on the trailer. The trestles can be seen standing next to the boat in this photo. The centre column which took all the weight was a length of 8 inch square timber. We also made wedges to slide in between the hull and the horizontal top of the trestle to stop the boat from rolling. In addition, we placed supports between the gunwales and the ground to further limit any possibility of the boat rolling. 


We manoeuvred the trailer into the position where we wanted the boat to be for painting and unhitched the car. We then lowered the jockey wheel to raise the stern of the boat. We placed one of the trestles under the stern and fitted the wedges and supports. Raising the jockey wheel lifted the stern off the trailer. We then hitched the car back on and using a modified trolley jack raised the bow of the boat off the trailer. This allowed us to roll the trailer forward until the jack reached a cross member. We lowered and repositioned the jack, repeating this process until the bow was just on the rear of the trailer and we could fit the second trestle under the boat. 

This method of taking the boat off the trailer meant that it wasn't dragging on the ground and getting scratched and at any time the furthest it could fall was a few centimetres. It also put the boat into a position that where we could easily paint it without large areas being out of reach.

Putting it back on was just a case of reversing the process and pushing the trailer back under the boat.

Monday, January 10, 2011

Tidying up the deck - bow roller and hawse pipe

The original layout of the deck was cluttered, leaving little area to stand when on the bow. In addition to this the hawse pipe into the rope locker was too small a diameter to let the rope pass easily through. No eyes or chain could go through it either.


To fix things up a bit I decided to mount a bow roller to hold the anchor and fit a larger hawse pipe to allow better access to the locker.

There were just two problems with this idea. First, the bow is molded where the chain plate is meaning that I would have to build up to put the bow roller in place. Second there is a floatation chamber under the forward deck that the new hawse pipe would have to pass through.

In the photo the flotation chamber runs from under the forward windows on either side up into the bow.


Cutting a hole through the flotation chamber didn't seem like a really smart idea, so some glassing would be necessary.

First thing was to build up the area around the chain plate molding to make a surface to bolt the bow roller through. This was done with epoxy and filler shaping and sanding by hand to get the final shape. You can see the new hawse pipe sitting in place to get an idea of layout.


I then set about slowly grinding away the old pipe to open up the hole into the flotation chamber and then into the locker. In this photo you can see the hole cut through the deck and through the chamber.


And in this one, all the way down into the locker.


I then built up many layers of glass to create a new, larger pipe and reseal the chamber so that it was airtight and buoyant again.


The new pipe ready for sanding and filling.


Looking down through the new hawse pipe and new glass work.


The new layout of the deck fittings.


Removing and repairing the old thru hull


This old thru hull once served as the drain for the sink which has long since been removed.

A previous owner decided that the best way to deal with the remaining fitting was to shove a cork into it and paint over it.


As part of fixing up the hull and removing all the old unnecessary fittings the thru hull had to go.

Using a small grinder the old fitting was cut out of the glass. It was not possible to simply unscrew it as it had been glassed in on the inside.

The hole was then flared out to a big shallow cone shape to allow many layers of new glass to be epoxied in to fill it.


The hole from the inside after cutting out the fitting.


I then wedged a wax paper covered backing plate over the hole on the inside to give me a surface to build up against.


Staring with the largest diameter first circles of glass were epoxied into the depression. In total around 20 layers of glass were built up over the hole.


The glass build up was kept slightly lower than the surrounding surface to allow some thickness for filler to be applied to smooth the surface.

Once cured the glass was rough sanded and cleaned then faired with epoxy filler.

After a bit more sanding it is hard to tell there ever was a thru hull here.


Thursday, October 7, 2010

Removing the bottom paint

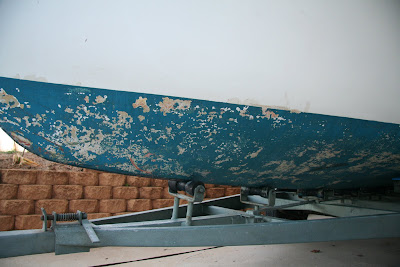
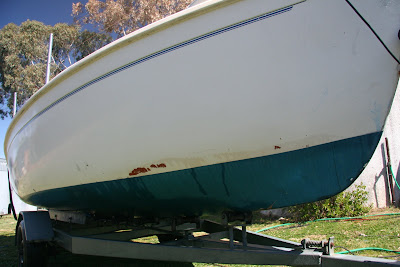
At some stage in its history the boat was painted white with a blue antifouling.


From what I could see under the flaking paint the original gelcoat was a brown with a white boot stripe. You can see the brown gelcoat under the flaked paint a the bow in the picture below.


Because of the scrapes in the fiberglass in places, wanting to plug the old thru hull and the general poor condition of the paint I decided that a repaint was necessary. The need for repairs and the condition of the exposed gellcoat meant that restoration of the gellcoat was not possible.

The previous owner had kept her on a mooring and there was what appeared to be minor blisters along the waterline above the antifouling.


As I don't plan on keeping her in the water for long periods and I want to fully repaint, all the old bottom paint had to go.

We began by trying to take the paint back by hand. Sealing up the area to catch any waste we tried a combination of water blasting, wet sanding, grinding and scraping, but didn't progress too far.

The photo below is post water blasting, pre wet sanding and scraping...


Below is after days of wet sanding ... not much progress!


After not much progress we decided that a more efficient method of paint removal was necessary, so we sought professional help...

Soda Blasting...


The entire boat was sealed into a tent with positive air flow to prevent any nasties escaping.


And all the used soda and removed paint was collected in this sock at the other end.


This progressed much faster than trying to do it ourselves, and the big plus is that someone else was doing the dirty work for us!


The finish after soda blasting was excellent. There was very little need for extra filling and sanding beyond filling the scratches and blisters that were already there.


Another plus. As this was done far away from any salt water by a person who normally works on car bodies and other bits of metal the price was measured in real dollars not boat bucks.

Thursday, September 24, 2009

More Nomad history

On advice from Floyd over at TSP I began looking into the Comet 20. "Ozboatie" put together a bit of info on the Comet, apparently the Comet began life as the Nomad before a split lead to one partner modifying the mold to be the Comet and the other still building the Nomad.

From Ozboatie on TSP:
History
The original design was know as a Nomad trailer sailer and was designed and built in N.S.W .by two partners. They had a disagreement and split up. One came to Melbourne with the mould. He modified it by adding a cabin hatch and raising the cabin height, changing the bow shape and the interior mouldings. He started a boat sales yard under the name of Bardo Sales.

The Comet is a far better looking boat than the Nomad. There were also a small number of 18’s made . There were about 65 or 70 Comets sold.


Comet 20 - the bow and pushpit are obviously different to the Nomad 20 but the cabin top is clearly very similar.


This Comet looks to be on the same trailer as my Nomad.


A Comet interior (I don't know if this was standard). I believe my Nomad originally had a similar starboard galley but this was later cut away.


Comet 20 sales information.

How the numbers stack up based on the sales info for each make

...................................Comet 20..............Nomad 20
Length...........................19'7" ...................19'3"
Beam...............................7'3".....................7'2"
Head Room....................4'6"....................4'6"
Main Sail ...................100 ft sq..........108 ft sq
Jib.................................94 ft sq.............60 ft sq
Displacement..........1600 lb..................1600 lb
Ballast........................500 lb ..................330 lb
Draft plate up...............11" .......................12"
Draft plate down.........4'3"......................4'6"

Wednesday, September 23, 2009

The repairs begin...

After sailing a few times I've decided to get stuck in and fix the boat up so that it is more enjoyable and safer. This will mostly be fixing what has been neglected for a few years.

The list at the moment includes:

Repaint - the boat was painted and antifouled by a previous owner. It all has to go ready for a shiny new coat.
Remove old fittings - after 30 years there are numerous old fittings stuck here and there that will go during the repaint. These include old boarding steps (that were behind the ladder) lots of old bits of deck organisers, an old thru hull for a sink that no longer exists.
Epoxy holes - fill all the holes from the old fittings.
New deck hardware - replace old clam cleats, fit new bungs, new hawse pipe (one the anchor chain fits thru), bow roller.
Rewire - the old electrics looked like a nightmare so the entire system is going and a new one being fitted.
Running rigging - fit topping lift and slab reefing.
Repair trailer - there is a bit of rust in the trailer and the rollers are shot. Overall it needs a service.

The first step is to take everything off the hull so we can clean it back to gelcoat and see what is hidden under the paint and fittings.


Original gel coat is visible where the white has flaked from sitting in the water


An area of gelcoat has been exposed on the bow with a bit of scraping.


On the deck the lifting paint can be seen as well as the old anchor holder (the anchor has rusted away while in the holder), and the dead solar panel. The hawse pipe just behind the roller furler is too small for the eye or anchor chain to pass through resulting in it being piled on the deck. That allows it to slide around nicely when sailing or towing. The bollard is also too small to effectively hold the anchor line.


Damage to the rubbing strip from being mored.


The name plate. I don't know why the Nomad had been covered over. I don't know if I'll be able to save these as they are fairly damaged.


Stern view. Another thing on the list is to build a new hatch and fix the timber trim.

On the weekend we began the process of stripping the hull. Lots of crawling into small spots to get to nuts and bolts.


The bow stripped


Cabin top. All the bits on the right were the rotting remains of an old deck organiser.


The hatch. This skylight was covered by the old solar panel. Unfortunately it is painted on the inside also. The hatch needs some repairs, there is a crack in the back from flexing when opened.


The stern. There was a lot of stuff on there and none of it was bedded properly. The lowest bung was just a press fit!


Where the stanchion was positioned. Again, not properly bedded and obviously leaking. We are currently debating if we will refit the stanchions. The lines are too low to hold you in the boat (particularly if you are on the cabin top) and having them means you have to walk over the cabin top to go forward and cuts down on deck space forward. I might just fit grab rails on the roof and open the side decks up.


The cockpit seats. Getting all the old flaking paint out of that moulded nonslip will be fun!


The stripped hull in the carport ready for work. It looks much sleaker without all the extra fittings.


The stripped interior. This will be repainted.


New woodwork will be fitted around the companionway.


Some of the beautiful electrics I found when I removed some panels.


The old thru hull from the original sink. The method used to seal it up was a cork and paint over!


I tried to get stuck into the antifoul with the high-pressure cleaner. It started to lift it fairly well. Lots of safety equipment worn in the process. This looks like it will be a long job.


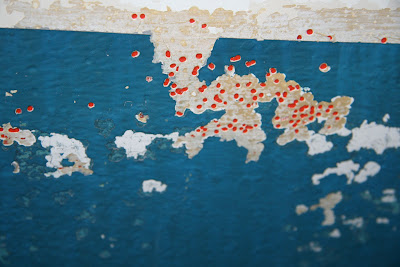
Blisters? Dimples appeared under the antifoul as the cleaner took it off.


An example of the damage from the old trailer rollers.